
In order to develop a new extractor for the Extraction Framework, it is necessary for it to declare dependency of extractors-core library and be OSGi-compliant.
Create Extractor from Maven archetype
Pre-requirements
- Java Development Kit (OpenJDK, Oracle JDK) (installation instructions)
- Apache Maven (info) (download)
Create Project
To get started, just generate a new project using the context-extractor-archetype, by opening a terminal and running:
$ mvn archetype:generate -DarchetypeCatalog=http://timbus.teco.edu/maven -q
This command will ask what archetype to be used:
Choose archetype:
1: http://timbus.teco.edu/maven -> net.timbusproject.extractors:context-extractor-archetype (-)
Choose a number or apply filter (format: [groupId:]artifactId, case sensitive contains): : 1
Then, it will ask for the following properties to be set:
artifactId: extractor's jar name, with lowercase letters and no strange symbols [1]extractorPackage: extractor's own package namepackage: absolute package hierarchy, includingextractorPackageextractorName: extractor's name
Like the following example:
Define value for property 'artifactId': : example-extractor
Define value for property 'extractorPackage': : exampleextractor
Define value for property 'package':  net.timbusproject.extractors.exampleextractor: :
Define value for property 'extractorName': : Example Extractor
And, finally, to confirm the configuration:
Confirm properties configuration:
groupId: net.timbusproject.extractors
artifactId: example-extractor
version: 0.1.0-SNAPSHOT
extractorPackage: exampleextractor
package: net.timbusproject.extractors.exampleextractor
extractorName: Example Extractor
Y: :
Press Enter if configuration is correct; type n and Enter to redefine properties.
Note: All configuration set during this process can be changed after.
After project is generated, the structure should look like the following:
example-extractor
├── pom.xml
└── src
    ├── main
    │   ├── java
    │   │   └── net
    │   │       └── timbusproject
    │   │           └── extractors
    │   │               └── exampleextractor
    │   │                   └── Extractor.java
    │   └── resources
    │       └── META-INF
    │           └── spring
    │               ├── bundle-context-osgi.xml
    │               └── bundle-context.xml
    └── test
        ├── java
        │   └── net
        │       └── timbusproject
        │           └── extractors
        │               └── exampleextractor
        └── resources
Pack Project
Open a terminal and, from the root folder of the project, execute:
$ mvn clean package
This will create a JAR file under target folder.
Deploy Extractor
Pre-requirements
- Java Development Kit (OpenJDK, Oracle JDK) (installation instructions)
- Virgo (info) (download)
Deploy
Before deploying an extractor, it is necessary to have Virgo Jetty installed, configured and running. Configuration implies the extractors-core to be put in repository/usr folder along with corresponding dependencies.
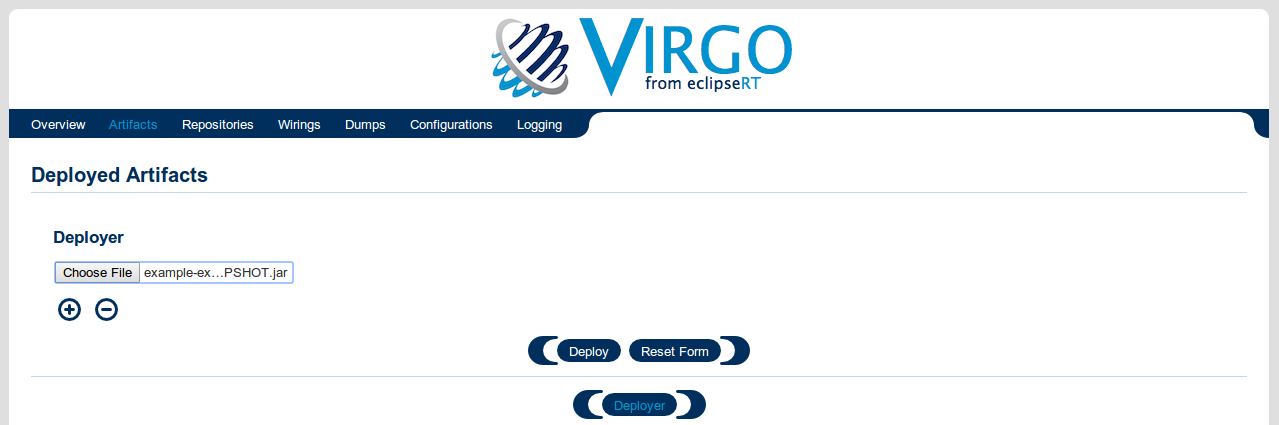
To deploy the extractor's JAR file, browse to localhost:8080 (if port not changed). Now, you should see the Virgo splash screen:

Then, click on the Admin Console (top-right corner of the Virgo splash screen) and login. JAR files are deployed under the Artifacts tab after clicking the Deployer button. After deployed, they are displayed under the bundle tree node within the Artifacts tab.

After pressing Deploy, it returns the deployment result. If deploy was successful, the message should look like this:
example-extractor-0.1.0-SNAPSHOT.jar deployed as bundle - net.timbusproject.extractors.example-extractor: 0.1.0-SNAPSHOT